Import an API
Make the things another service already does — look up a customer, raise a ticket, post an order — into steps you can pick from a list. You import the service’s description once, and Kitewell builds the forms, so a workflow step is a few fields to fill in rather than a request to write.
What you need
Section titled “What you need”- An OpenAPI document for the service: a JSON or YAML file in OpenAPI 3.0 or 3.1. Whoever runs the service publishes it, often as a link on their developer page named “OpenAPI” or “openapi.json”. Ask them for it if you cannot find it.
- The token, key, or password the service expects, if it needs one. Keep it ready, but do not type it into a workflow: it belongs in a secret.
- For a service you sign in to with OAuth 2.0, such as many accounting and CRM services, an app registered on its developer page instead. See Sign in with OAuth 2.0.
A connection belongs to one project, and every workflow in that project can use it.
Import a service
Section titled “Import a service”- In the project sidebar, open More → API library and choose Import an API.
- Choose how the document reaches Kitewell: Upload file, From URL, or Paste specification.
- Choose Preview actions. Kitewell reads the document and opens Review & connect, which lists everything the service can do.
- Under Explore actions, search by name, path, or tag and select an action to read its inputs and responses. An action Kitewell cannot run as a step says why, right there.
- Under Connection, check Name, API identifier, and Server URL. Fill in the server address yourself if the document has none.
- Choose Authentication and connect a secret if the service needs one. See Connect credentials below, or Sign in with OAuth 2.0 for a service you sign in to.
- Choose Connect API.
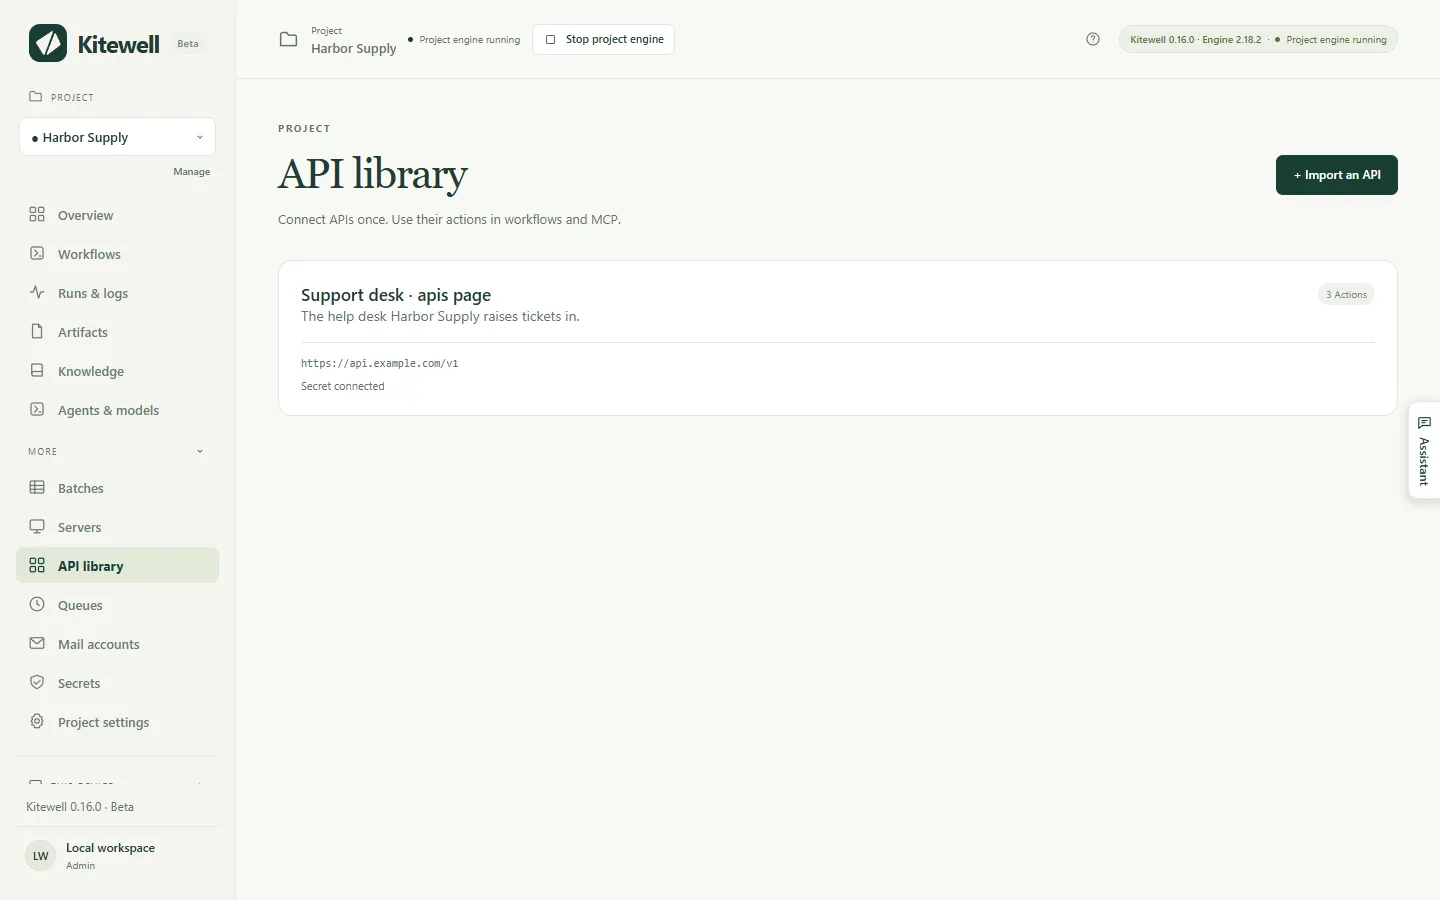
The connection then appears as a card in API library, with how many actions it has and whether a secret is attached or, for OAuth 2.0, whether this device is signed in.
Choose the card to come back to the same screen at any time: its settings on the left, its actions on the right.
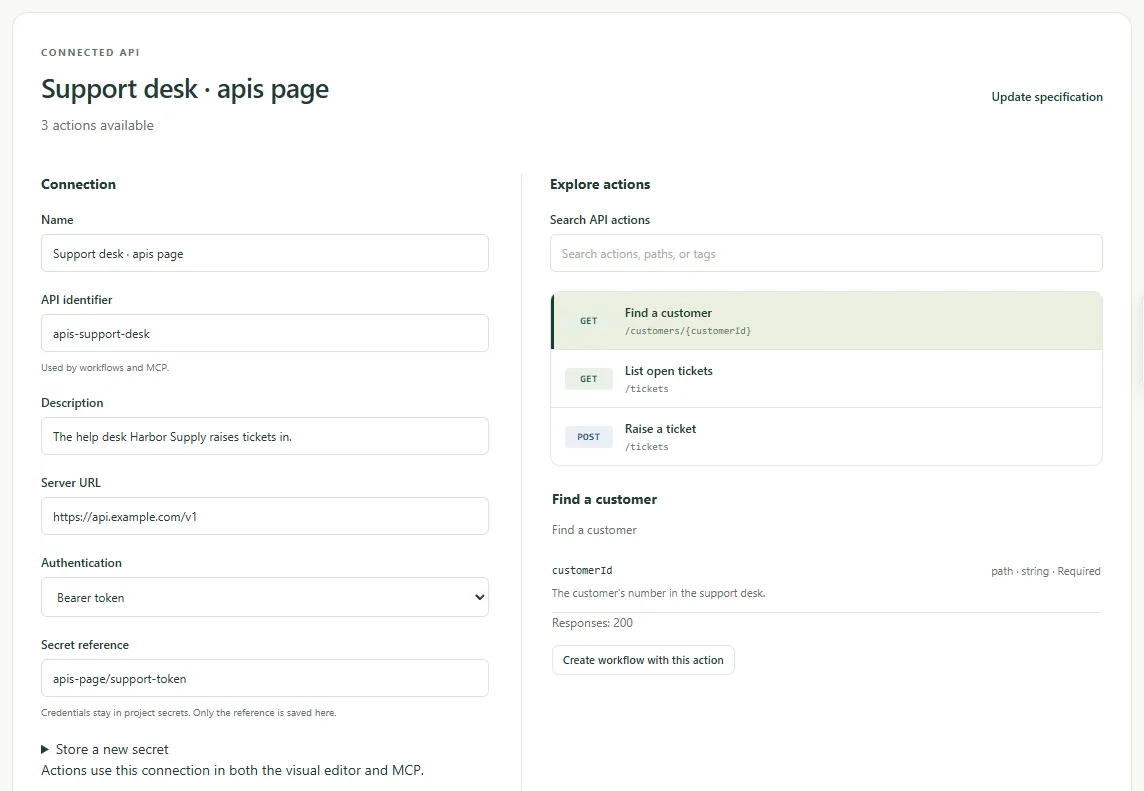
API identifier is the name workflows use to find this connection, so it stays the same once saved. The document itself is stored in the project, even when it came from a URL, so nothing is fetched again at run time. Previewing or connecting never calls the service.
If the document’s URL needs a sign-in of its own, download the file in your browser first and use Upload file or Paste specification.
Connect credentials
Section titled “Connect credentials”Under Authentication, choose what the service expects: No authentication, Bearer token, API key, Username and password, or OAuth 2.0 sign-in. The last has a section of its own below. For API key, also give its Key name and choose Send key in: Header, Query parameter, or Cookie.
Then name the secret that holds the value. Type or pick an existing
Secret reference from the same project, such as services/support-token.
To make one here, open Store a new secret, type the value under
Password or access token, and choose Store secret.
For a bearer token or an API key, the secret holds the token or key itself. For Username and password, type the Username into the connection and keep the password in the secret.
The connection stores only the reference. Kitewell looks the value up and adds it to every request that uses the connection, and the value itself never appears in a workflow or a log. See Secrets for replacing a value later.
Sign in with OAuth 2.0
Section titled “Sign in with OAuth 2.0”Some services have you sign in and allow access rather than hand out a token. Kitewell signs in to them once on each device and keeps the access current from then on, so a workflow never handles a token.
- On the service’s developer page, register an app. Where it asks for a
redirect URL (sometimes called a callback URL), give the Redirect URL
Kitewell shows under Authentication, such as
http://127.0.0.1:19741/oauth/callback. The service sends you back to it after you sign in. Note the client ID, and the client secret if the service gives one. - Under Authentication, choose OAuth 2.0 sign-in. When the service’s document describes its sign-in, Kitewell fills in Authorization URL, Token URL, and Scopes. Otherwise copy them from the developer page.
- Type the Client ID. If the service gave a client secret, name the secret that holds it under Client secret reference, or make one with Store a new secret. Leave it empty when there is none.
- Choose Connect API. Kitewell saves the connection and starts the sign-in: choose Continue in browser, sign in to the service, and allow Kitewell. Back in Kitewell, Sign-in on this device reads Connected since the time you signed in.
Kitewell renews the access before it expires, including for services that issue a new refresh token each time. If the service stops accepting the sign-in, because someone revoked it or it went unused too long, the card in API library reads Reconnect needed and the connection shows the service’s reason. Choose Reconnect and sign in again.
The sign-in belongs to the device it was made on. Each person who runs these workflows on another device chooses Connect there once. Until then, a run that uses the API is refused before it starts, and the project’s overview names the API to connect. Backups and project exports do not carry the sign-in. Disconnect removes it from this device. Saving a different client ID, endpoint, or scopes also ends it, so connect again afterwards.
Use an action in a workflow
Section titled “Use an action in a workflow”- Open the workflow, go to Build, and choose Add step.
- Choose Use an API action.
- Choose a Connected API, then search under Find an API action and pick the one you want.
- Fill in the inputs Kitewell generated. The required ones come first; open
Optional parameters for the rest. A Request body form appears when
the action takes one. For a file the action uploads, give its full path on
this device, such as
~/Documents/receipt.pdf, or pick an earlier step’s output that names one. - Use Variables beside an input to insert a workflow input or a value from an earlier step.
- Choose Tools → Check workflow, then save and run it, and read the result under Runs & logs.
You can also start from the service: open its card in API library, select an action under Explore actions, and choose Create workflow with this action.
Pass a result to the next step
Section titled “Pass a result to the next step”Open Response fields on the API step to see the fields the document describes. In a later step, open Variables beside an input and pick one of them. Kitewell adds the mapping and connects the two steps, so the later step waits for the API call to finish.
A customer lookup can hand its id to a step that raises a ticket, for
example. Which fields are offered depends on what the document says the
response contains. When it describes nothing in detail, the whole response is
available as one value.
Update a service’s description
Section titled “Update a service’s description”Kitewell keeps the document as it was when you imported it. A change at the original URL does not reach the project on its own.
- Open the connection in API library and choose Update specification.
- Upload, fetch, or paste the new document, then choose Preview actions.
- Review the actions and choose Save connection.
Kitewell checks the project’s workflows before it saves. If the new document would break a saved workflow — an action it uses is gone, or its inputs changed — the update is refused and the old connection stays. Fix those workflows first, or import the new document under a different API identifier and move the workflows over one at a time.
For the same reason, a connection cannot be deleted while a saved workflow uses it. Delete API names the workflow that is holding it.
Share a connection without its credentials
Section titled “Share a connection without its credentials”A project export carries the imported document and the connection’s settings: the server address, the kind of authentication, and the secret’s name. Secret values are not included. On the receiving device the secret shows Value needed in Secrets until someone sets it there, or you point the connection at another secret in that project.
An OAuth 2.0 connection carries its client ID, endpoints, scopes, and the client secret’s name, but not the sign-in. Each device that runs its workflows connects once.
The export also keeps the address the document came from. A credential typed straight into the document, a server address, or a workflow input is not removed for you. Look over those fields before you share the file.
What the importer accepts
Section titled “What the importer accepts”- One JSON or YAML document, up to 8 MiB. A Swagger 2 document has to be converted to OpenAPI 3.0 or 3.1 first; Kitewell says so if you try.
- References must point inside the same document. Bundle external references before importing.
- A request body may be JSON, a URL-encoded form, text, or a multipart form. A file a multipart form uploads is given by its path on this device, up to 100 MB. Other binary bodies are not available as API steps; use a web-service step for those.
- An action that needs two credentials at once, or an authentication scheme Kitewell does not handle, is marked in the action list with the reason.
- Paging is not automatic. Give the page or cursor input yourself, and repeat the request in the workflow.
The same imported actions and schemas are also open to an AI assistant with edit access. See MCP and API access.
Kitewell is developed and supplied by Descarty, Inc. (Tokyo).